
Butter is something I’m passionate about. I’ve always loved butter. Even when I was trying to be vegan in high school, I liked fake butter. Then, when I returned to the real thing, it was like being reunited with Truth, an experience of tasteful clarity that lightening-bolted Earth Balance off my grocery list for good.
With having dairy cows, butter is one of the necessary things in the summer time. And I love that, unlike butter substitutes, it comes from the sunlight and earth that grows the grass, my dear cows that graze, my own two hands that milk and skim. It is so independent and involved!
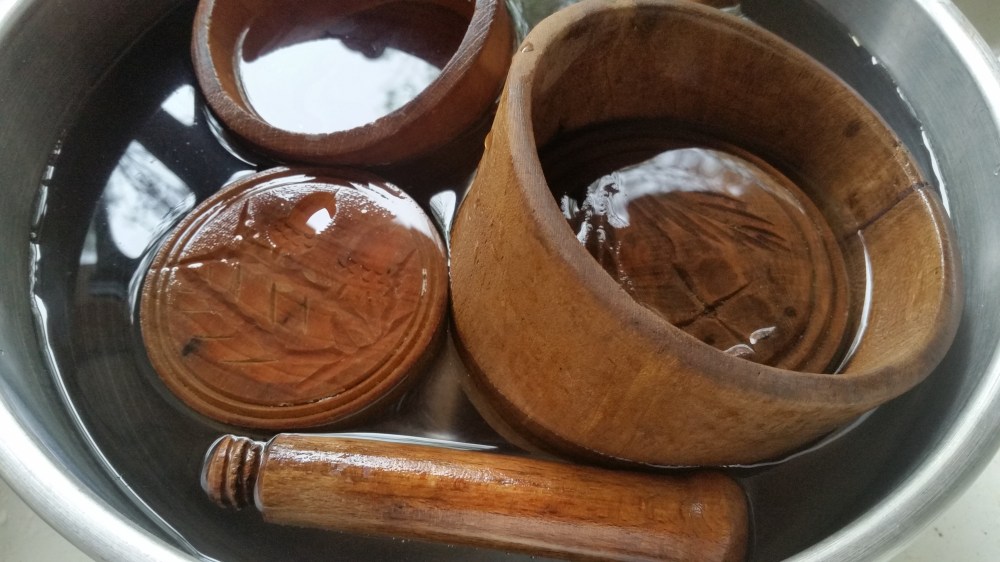
1 – I start by skimming the cream and soaking the wooden butter molds. If they are not soaked, it is nearly impossible to get the butter out. They like to be soaked for 20-30 minutes before being packed with butter, so I start them soaking just as I start the cream churning.

2 – The cream is churned. The temperature of the cream will vary the churning time. Too hot or too cold, it will take much longer. I’ve read that 55 F is the ideal churning temperature. In the summer time, I generally take cold milk out of the fridge, skim, and set it right to churning. In cold weather, it warms up more slowly while it is churning, and it seems to help to leave the cream on the counter for 15 minutes or so before churning.

3 – The butter forms, yellow clumps swimming in blue-white buttermilk. If the cream was cultured, it will be tangy buttermilk. Otherwise, it is just plain non-fat milk.

4 – The buttermilk is poured off, and the butter must be washed.

5 – Washing butter takes time, but it pays to be patient and do a good job. The better it is washed, the better it will keep. Some days I have been in a hurry and just packed the butter away before the washing water ran clear. When I melted that butter, it had buttermilk in it as well that was not washed out.
To wash, pour cool, clean water over it and work it and knead it, either with a wooden spoon or your clean hands. Pour off the water when it is cloudy, and add fresh water. Keep at it until the water runs off clear.

6 – Salt the butter (if you want salty butter. Otherwise, skip this step). I use fine-grained sea salt to salt butter. I sprinkle the salt on, let it sit a minute to dissolve, and then knead it in.

7 – I like to mold butter into pretty shapes with wooden butter molds. They must be soaked in cool water for about 20-30 minutes before packing the butter in, so I start soaking them when I put the cream on to churn. This step is not necessary, but it is fun! Otherwise, butter can be rolled into balls and wrapped in parchment paper.

8 – there’s a little bit of a trick to packing the butter in well – you want to pack it in evenly, so that there aren’t air pockets, and the molded picture comes out nicely on top. This is easier said than done. After it is packed into the mold, put the mold in the fridge for about 30 minutes. The chilled butter comes out more easily.

Butter is beautiful! But it tastes even better!
